How to Configure a CDN to Boost Your Website’s Performance

Website performance isn’t just a nice-to-have—it’s a necessity. Speed directly influences user experience, search engine rankings, and conversion rates. One of the most effective tools in the performance optimization toolkit is a CDN, or Content Delivery Network. If you’re running a site that serves a global or even national audience, implementing and configuring a CDN correctly can dramatically enhance your website’s speed, security, and reliability.
This guide walks you through what a CDN is, how it works, and most importantly, how to configure one to get the most out of your website.
What Is a CDN and Why Does It Matter?
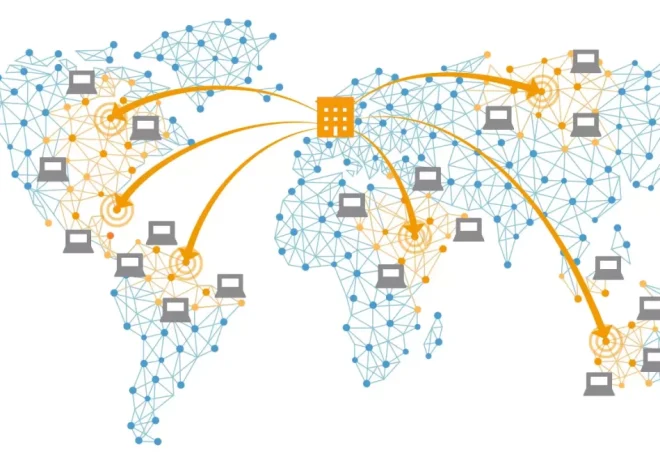
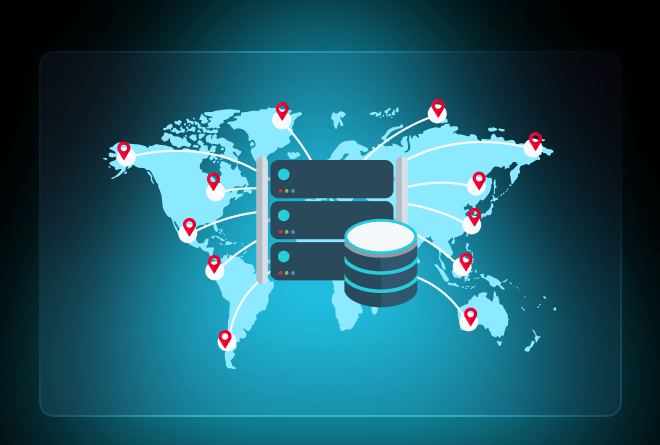
A Content Delivery Network is a network of geographically distributed servers that work together to deliver content to users based on their location. Instead of loading your website’s assets (images, scripts, stylesheets, videos) from a single origin server, a CDN caches those assets and delivers them from the server closest to the user.
This minimizes latency, reduces load on your origin server, and ensures a faster and more consistent browsing experience for users across different regions.
Benefits of Using a CDN
- Improved page load times
- Reduced bandwidth consumption
- Better scalability during traffic spikes
- Improved site security through DDoS mitigation
- Higher SEO performance due to speed optimization
Whether you’re running a blog, an e-commerce platform, or a SaaS product, a CDN can make a measurable impact on your site’s effectiveness.
Step 1: Choose the Right CDN Provider
There’s no shortage of CDN providers on the market. Some of the most popular include:
- Cloudflare – User-friendly, security-focused, and free options available.
- Akamai – Enterprise-level CDN with a massive global footprint.
- Amazon CloudFront – Best for those already in the AWS ecosystem.
- Fastly – Known for real-time control and low latency.
- KeyCDN – Cost-effective and simple for smaller projects.
When choosing a provider, consider:
- Number and location of edge servers
- Pricing model (pay-as-you-go vs. flat rate)
- Features like real-time analytics, DDoS protection, and HTTP/3 support
- Integration with your hosting stack or CMS
It’s not always about choosing the biggest provider, but rather the one that best matches your needs.
Step 2: Integrate the CDN With Your Website
Once you’ve picked a CDN provider, the next step is integrating it with your site. This process varies depending on whether your site is static or dynamic and how it’s hosted.
For Static Sites
Static sites (built with generators like Hugo or Jekyll) are straightforward to configure. Most CDN providers allow you to simply upload your files or point your domain to their storage.
For WordPress or CMS-Based Sites
If you’re running WordPress or a similar CMS, many CDN providers offer plugins or simple integrations. You’ll typically:
- Sign up for the CDN service.
- Enter your site URL to generate CDN endpoints.
- Install a plugin (e.g., WP Rocket or W3 Total Cache).
- Input your CDN URL into the plugin settings.
- Test and purge the cache if needed.
For Custom-Built or Dynamic Sites
Custom-built sites (e.g., using Laravel, Django, or Node.js) require a bit more configuration:
- Set your CDN endpoint to serve static files like images, JavaScript, and CSS.
- Rewrite your asset URLs to point to the CDN domain.
- Configure cache headers appropriately on the origin server.
- Ensure secure delivery using HTTPS and appropriate CORS settings.
Step 3: Configure DNS and SSL Settings
CDNs often work by becoming a proxy between your users and your server. That means DNS and SSL configurations must be handled carefully.
Updating DNS Records
Most CDN providers will ask you to change your domain’s DNS records to point to their servers. Typically, you’ll:
- Change your A record or CNAME to the CDN’s assigned endpoint.
- Leave email-related records (MX) untouched.
Setting Up SSL
A secure website is non-negotiable. Good CDNs offer free SSL certificates or allow you to import your own. Configuration steps usually include:
- Enabling HTTPS in the CDN dashboard
- Enforcing HTTPS redirection
- Validating the certificate if needed
- Testing your site using tools like SSL Labs to verify encryption
For WordPress users, make sure plugins like Really Simple SSL don’t conflict with your CDN’s HTTPS settings.
Step 4: Tune Caching Rules and Edge Settings
A CDN’s real power lies in its ability to cache content at the edge. But this doesn’t mean everything should be cached indefinitely.
What Should You Cache?
- Static assets: images, videos, JS, CSS, fonts
- API responses with long TTL (Time To Live)
- HTML content that doesn’t change often
What Should You Exclude?
- User-specific pages (like dashboards or shopping carts)
- POST requests or dynamic content
- Admin panels or login screens
Fine-tune your cache behavior using:
- Cache-control headers
- Custom rules in your CDN dashboard
- Origin cache purging when you update content
Some providers allow you to set cache behavior based on file type, URL pattern, or query string.
Step 5: Optimize Image and Asset Delivery
CDNs don’t just deliver content—they can optimize it in-flight.
Image Optimization
Many CDNs offer automatic image optimization, converting PNGs and JPEGs to WebP or AVIF formats on the fly. This can drastically reduce page weight.
Look for features like:
- Device-aware delivery (e.g., smaller images for mobile users)
- Lazy loading support
- Compression level customization
Minification and Compression
You can also enable gzip or Brotli compression for text assets like HTML, CSS, and JS. Minifying these files reduces file size even further.
Step 6: Enable Security Features
Security features are often baked into CDN offerings, and it’s worth taking advantage of them.
Common tools include:
- DDoS protection – Blocking malicious traffic at the network edge
- Web Application Firewall (WAF) – Filtering out harmful HTTP requests
- Rate limiting – Preventing abuse of public APIs or contact forms
- Bot mitigation – Identifying and blocking non-human traffic
You can configure most of these via a dashboard. Some providers even offer country blocking, custom challenge pages, or JavaScript challenges.
Step 7: Monitor Performance and Troubleshoot
Once everything is live, monitoring becomes crucial. A CDN will help speed up your site—but only if it’s working correctly.
Tools to Use
- CDN dashboard analytics – Monitor cache hit ratio, latency, bandwidth usage
- Google PageSpeed Insights / Lighthouse – Measure actual performance gains
- WebPageTest – Drill down into performance by region
- Real User Monitoring (RUM) – Provided by some CDNs for live feedback
If issues arise, investigate:
- DNS misconfigurations
- Mixed content warnings (HTTP assets on HTTPS pages)
- Cache not being updated after deploys
- Delays caused by overly aggressive caching rules
Test changes in staging first, then roll out gradually to production.
When to Reassess Your CDN Setup
A CDN isn’t something you “set and forget.” As your traffic grows or your content strategy shifts, reassess your configuration:
- Expanding into new geographic markets? Make sure edge locations are available nearby.
- Serving more video or large files? Consider enabling byte-range requests and adaptive bitrate streaming.
- Updating brand assets frequently? Automate cache purging post-deploy.
- Launching a mobile app that uses the same APIs? Review cross-origin settings and security filters.
Regularly review analytics and performance metrics to fine-tune your setup.
Configuring a CDN is one of the highest-leverage actions you can take to improve the speed and scalability of your website. It bridges the physical distance between your content and your users, reduces strain on your origin server, and opens up a suite of security features you’d otherwise need to implement manually. The key is to approach setup methodically—choose the right provider, configure DNS and caching rules with care, and monitor the results. Over time, a well-configured CDN becomes a quiet but powerful partner in delivering fast, secure, and reliable user experiences.